
Product guide · Start here
Getting started
You’ve signed up. This page takes you from an empty account to your first article: written from your own business details, published to your site, sent to Google and Bing, and tracked until it’s indexed. Nine steps, in the order that works.
The whole path
- Sign up and set your password.
- Add your site. AlmaSEO scans it in under a minute.
- Connect your site. On WordPress, AlmaSEO publishes for you. On any other site, you paste the article in yourself.
- Fill in the business profile. This is what makes the article sound like an expert wrote it.
- Connect Search Console, Bing and IndexNow, before the article exists.
- Find what to write about from the searches Google already shows you for.
- Write your first article.
- Publish it, and AlmaSEO tells the search engines.
- Watch it get indexed.
Publishing isn’t the finish line. An article only starts working once a search engine has it in its index, so the setup in steps 4 and 5 comes before the writing.
1. Sign up and set your password
Pick a plan on the pricing page. Every plan starts as a 14-day free trial with every Agency feature switched on. After checkout, AlmaSEO emails you a link: click Set Your Password, and you’re in.
If the email hasn’t arrived within a couple of minutes, check your spam folder.
2. Add your site
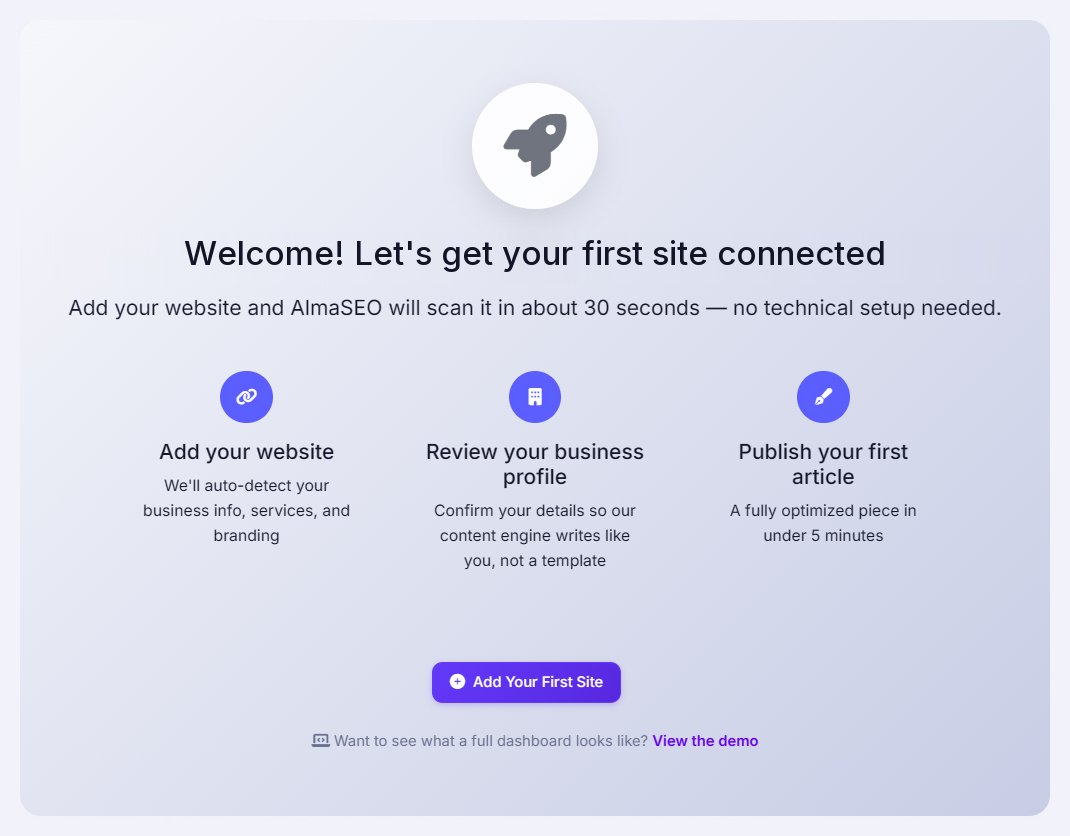
Your first screen is an empty Sites page with one button: Add Your First Site. It opens a short wizard:
- Site type. WordPress Website if your site runs on WordPress. Other Website for anything else: Wix, Squarespace, Weebly, a custom-built site or plain HTML. (The third choice, Website Build Project, tracks a build or redesign with tasks and milestones. It isn’t for publishing articles.)
- Site info. The name and the address.
- Scanning. AlmaSEO reads your pages and pulls out your services, credentials, tone of voice and contact details.
- Review. Check what the scan found and correct anything it got wrong. Everything saved here goes into your articles.
The Sites guide walks through every step of the wizard.
3. Connect your site
What this step involves depends on what your site runs on.
On WordPress
Connect AlmaSEO so it can publish straight to your site. This is the one step that happens partly inside WordPress, and the wizard walks you through it:
- On the Plugins step, download the AlmaSEO Connector.
- In WordPress, go to Plugins → Add New → Upload Plugin, upload it and activate it.
- Open AlmaSEO → Settings inside WordPress and copy the Connection Token.
- Back in the wizard, paste it on the Connect step. AlmaSEO tests the connection on the spot.
On any other site
There’s nothing to connect. Wix, Squarespace, Weebly, custom-built or plain HTML: AlmaSEO writes the article and hands it to you as Markdown or HTML, ready to paste into your site. Once it’s live, you give AlmaSEO the address, and from there it’s treated exactly like a WordPress article: sent to the search engines and tracked until it’s indexed. Steps 7 and 8 show where.
4. Fill in the business profile
This step decides whether your first article reads like an expert wrote it or like it could be about anyone. Google calls that quality E-E-A-T: experience, expertise, authoritativeness and trust. AlmaSEO builds it from what you tell it about the business.
Open your site, then the four tabs under Business Information:
- General Info
- Business name, industry, About Us, Business Owner, phone, email, hours and logo. The owner becomes the named expert in your articles and the author in the page’s search data. About Us gives AlmaSEO your background and years in business.
- Services & Areas
- Your services, the areas you serve, and your credentials: licenses, certifications, awards, insurance, guarantees, memberships. AlmaSEO only writes about services on this list, so it never promises something you don’t do. Credentials go into the article as proof.
- Social Profiles
- Facebook, LinkedIn, Instagram, YouTube and the rest. AlmaSEO links them at the foot of each article.
- Branding
- Your slogan, brand colours and Communication Style. The style is the tone each article starts with.
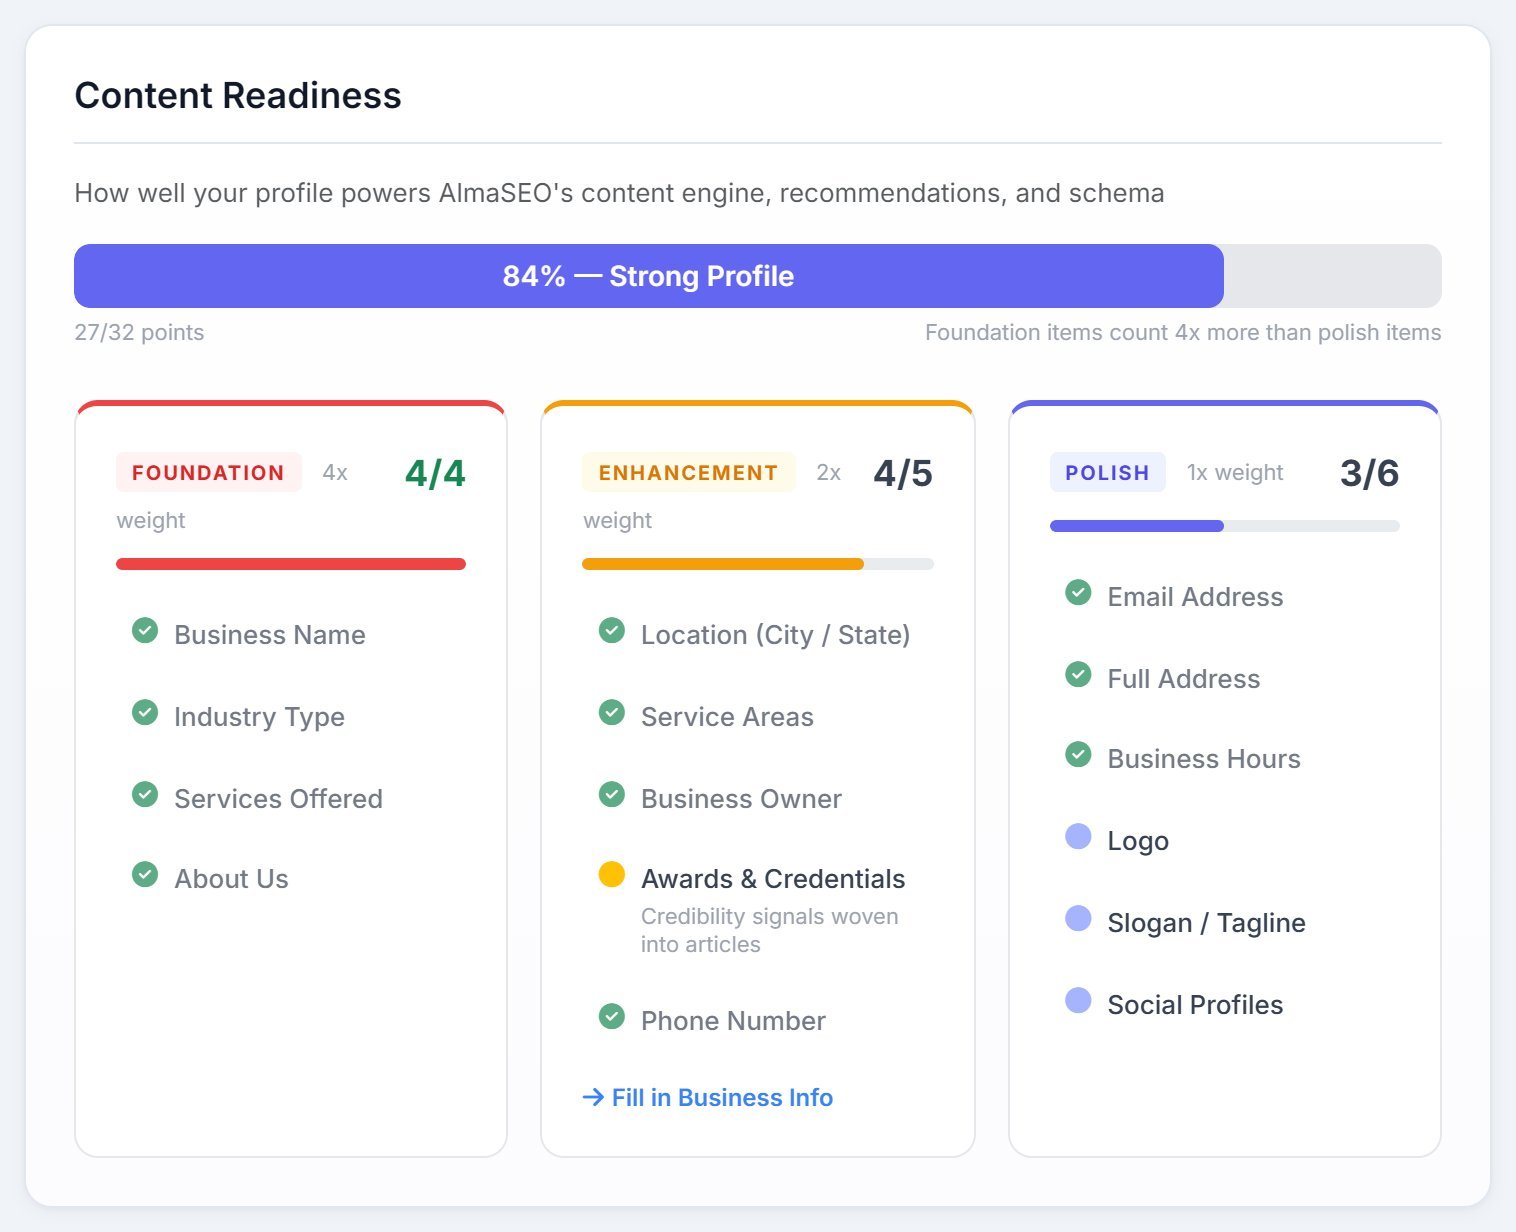
The site’s Overview keeps score with Content Readiness. Before you write, get all of Foundation done (name, industry, services, about us), plus as much of Enhancement as you can. Owner, service areas and credentials are the ones that carry the most weight for E-E-A-T.
5. Connect Search Console, Bing and IndexNow
Do this before you write, so the article can go out to the search engines the minute it’s live. Connect the search engines covers each one step by step, including what to do when your site isn’t in the list.
- Google Search Console
- Open your site’s Search Console tab and sign in with the Google account that owns the site in Search Console. This is the connection the rest of AlmaSEO leans on most: indexing status, clicks, rankings and every tool in SEO Intelligence read from it.
- Bing Webmaster Tools
- Your site needs to be added and verified in Bing Webmaster Tools first. Then open the site’s Bing Webmaster tab in AlmaSEO and paste your Bing API key. AlmaSEO checks that the site is in that Bing account.
- IndexNow
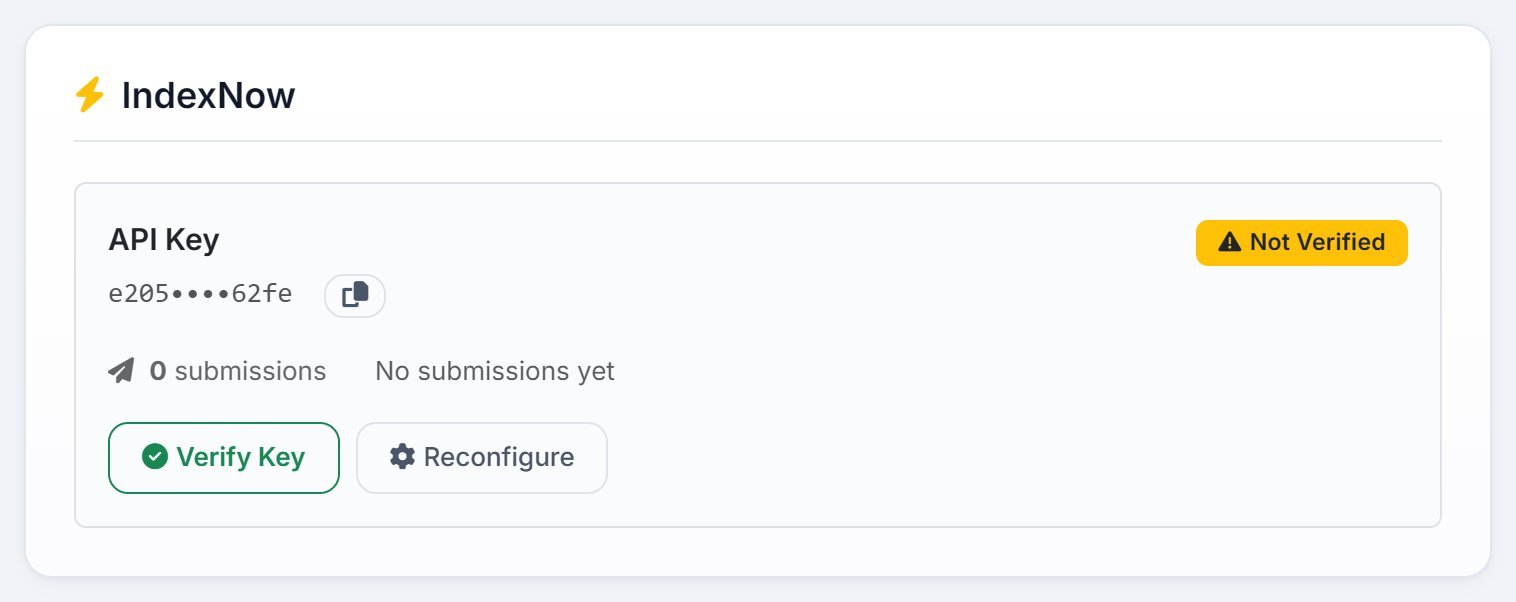
- On the site’s Overview, find the IndexNow card and click Generate Key. Save the key as a small text file, upload it to your site’s root, then click Verify Key File. IndexNow reaches Bing, Yandex and other engines that use it. It doesn’t reach Google.
6. Find what to write about
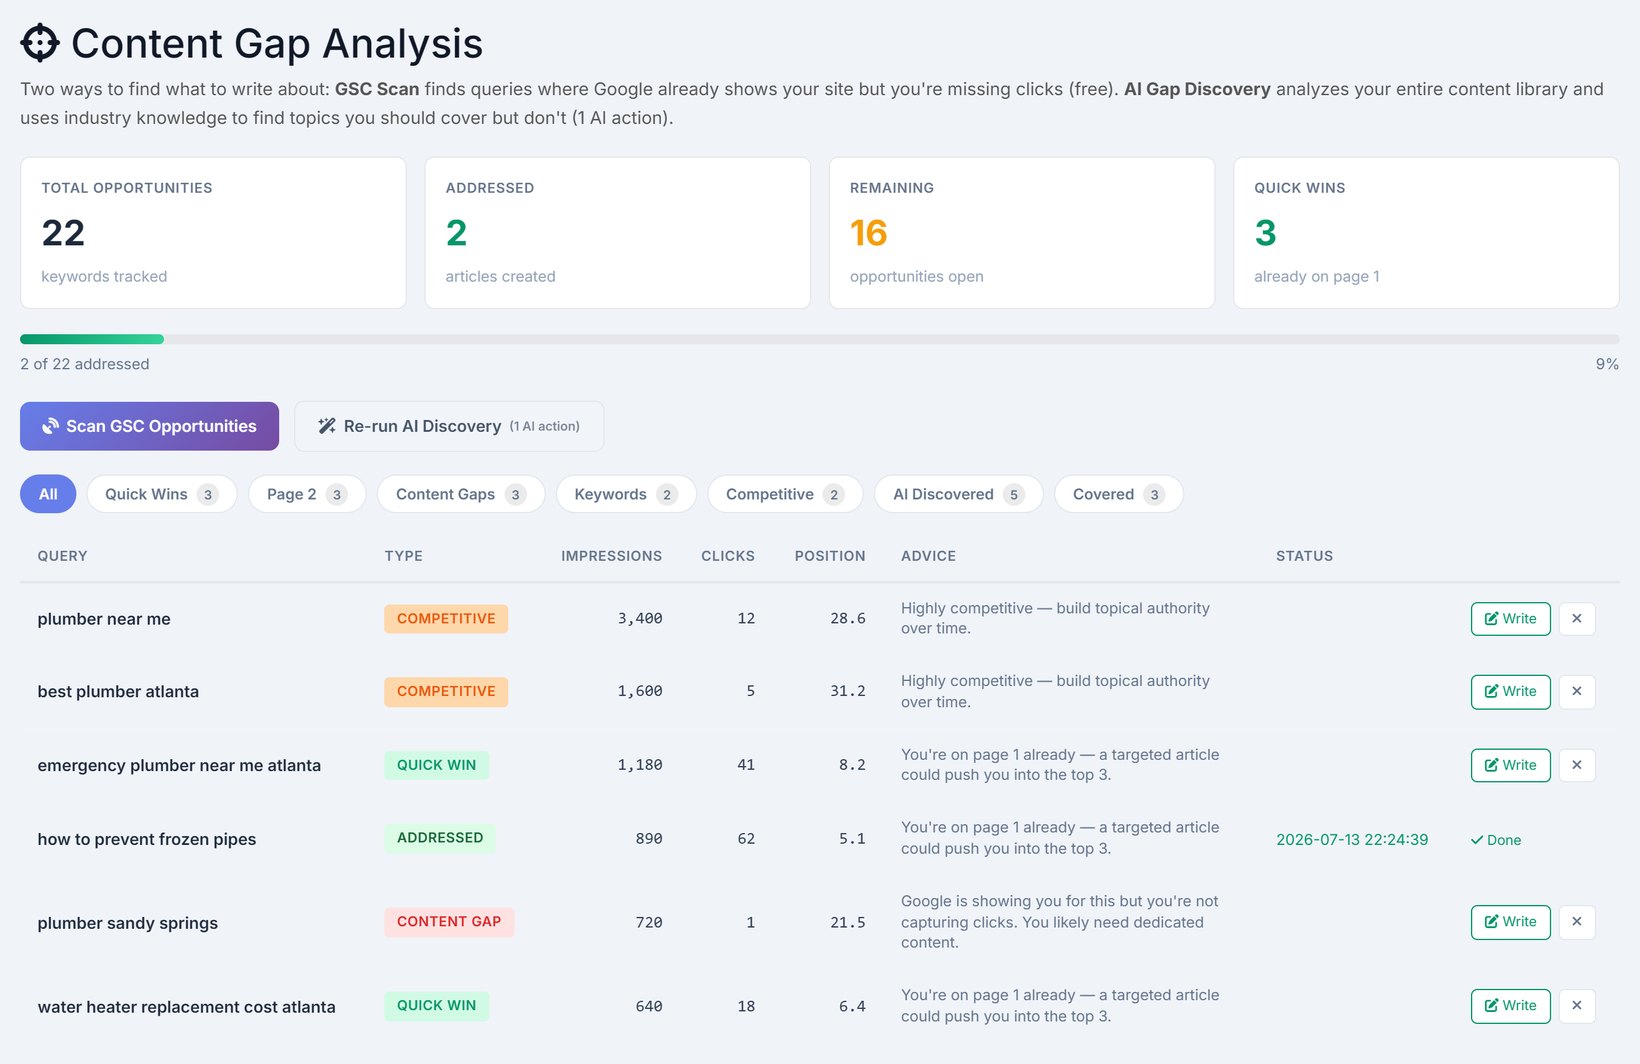
With Search Console connected, AlmaSEO can tell you what your first article should be about. Open Content Hub in your site’s menu, then Content Gap Analysis. It has two buttons:
- Scan GSC Opportunities
- Free, and done in a few seconds. AlmaSEO reads the searches Google already shows your site for and sorts them: Quick Wins (you’re on page one, and an article could push you into the top three), Page 2 (just off page one), Content Gaps (Google shows you, but nobody clicks), Keywords (phrases to work into pages you already have) and Competitive. Searches your site already has a page for are set aside as Covered.
- AI Gap Discovery
- Reads every page on your site alongside the business profile from step 4, and suggests topics a site like yours should cover but doesn’t. It uses one AI action.
Every row has a Write button. It opens Create Post with that topic already filled in, and once the article is created the row is marked Addressed, so the list doubles as a to-do list.
7. Write your first article
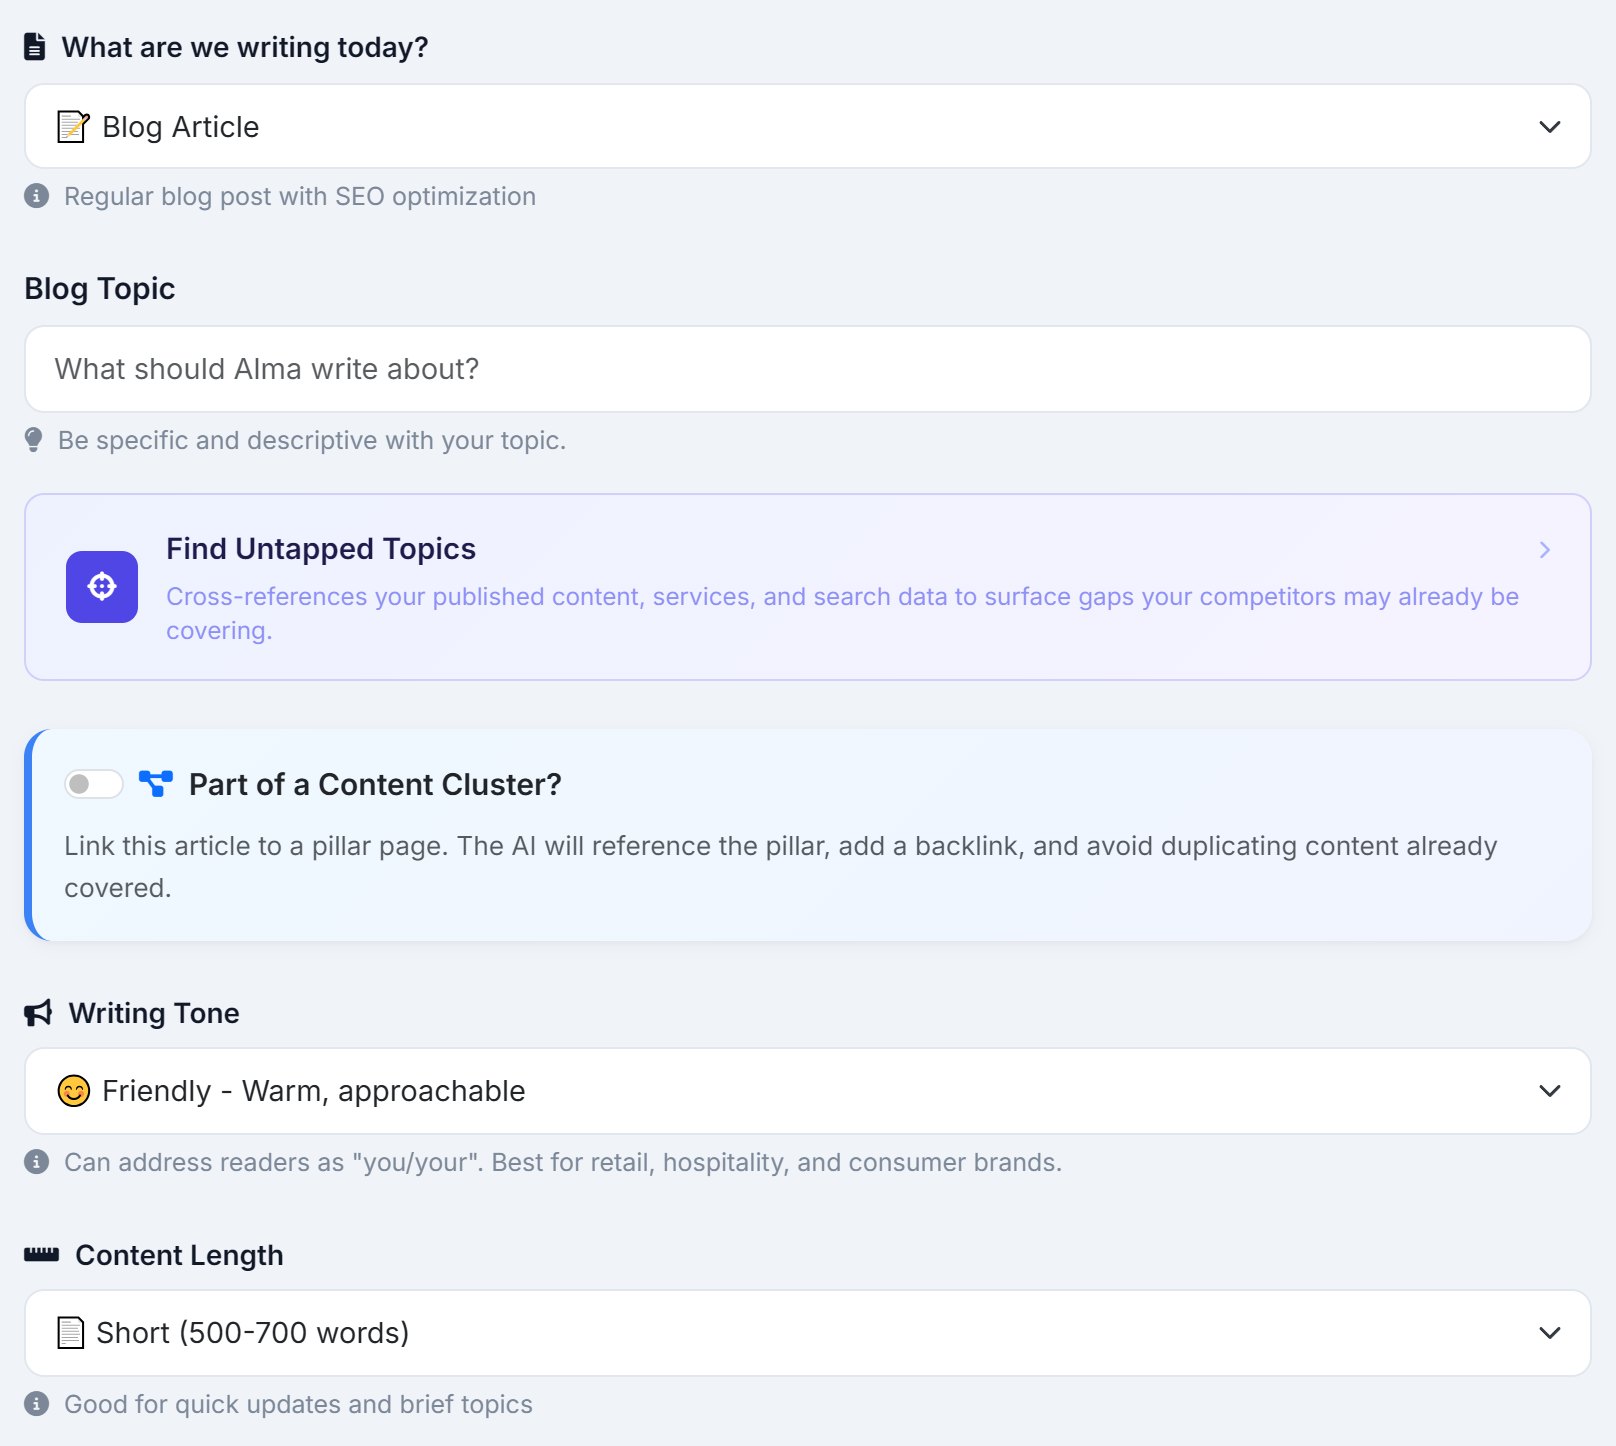
Click Write on an opportunity from step 6, Write New Article at the top of your site’s page, or the Write Your First Article banner on Sites. Then:
- Pick a page type. Blog Article is the usual first choice. There are ten more, from Service Page and City Landing Page to How-To Guide, FAQ and Comparison.
- Give it a topic. Coming from Content Gap Analysis, it’s already filled in. Otherwise, something your customers ask you about is a good start.
- Check the tone and length. The tone starts on your Branding style. Change it for this article if you like.
- On WordPress, choose when it goes live. Tick Publish Immediately to put it straight on your site. Leave it unticked and it saves as a draft for you to review first.
- Click Generate Article.
On any other site, Create Post opens in Static Site Mode and the button reads Generate for Export. When the article is ready, download it as Markdown or HTML and paste it into your site.
8. Publish, and AlmaSEO tells the search engines
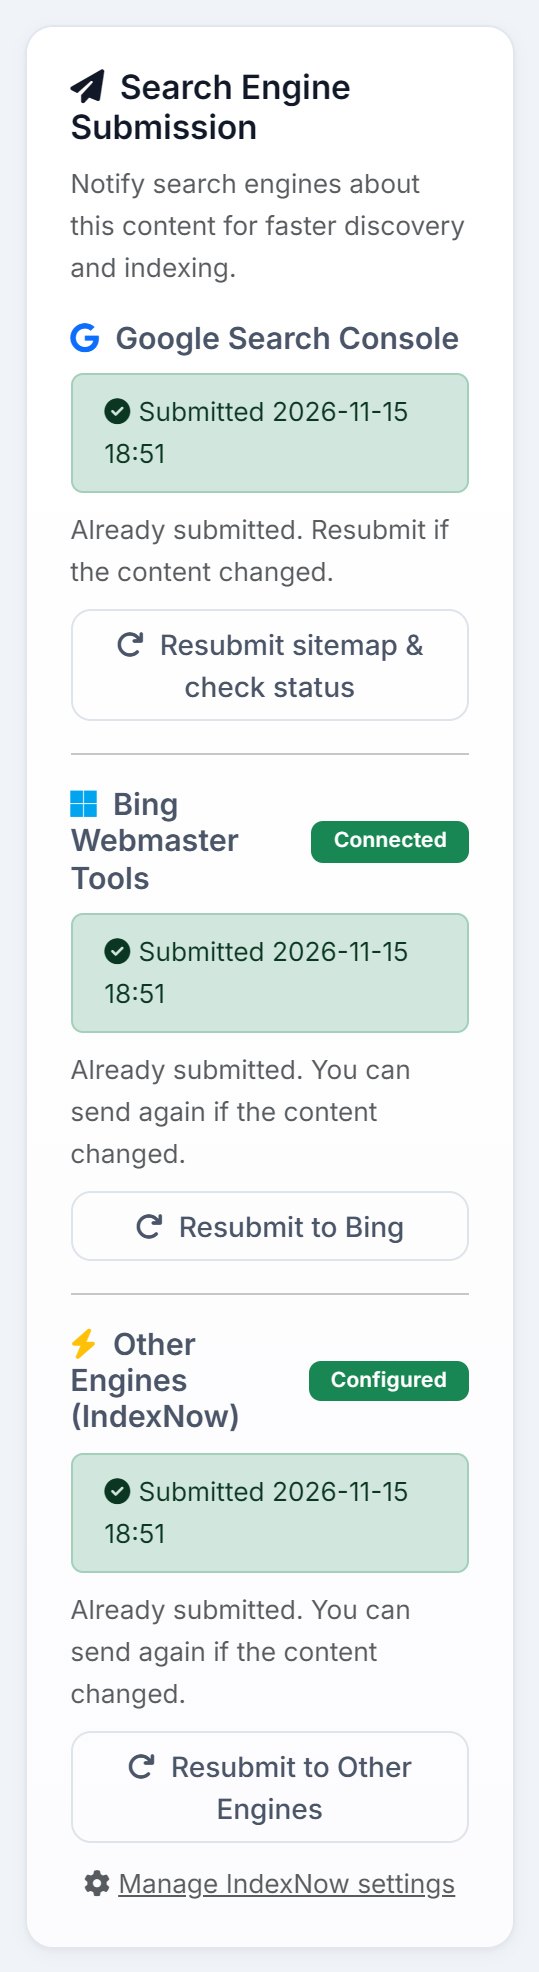
On WordPress, the moment an article goes live from Create Post, AlmaSEO sends it out to everything you connected in step 5. On any other site, publish the article yourself, then open it in AlmaSEO. Under Where did this article go live?, paste its address and click Save & Submit. Either way, it goes to the same three places:
- IndexNow
- The article’s address goes to Bing and the other IndexNow engines.
- Bing
- The address goes straight to Bing Webmaster Tools.
- AlmaSEO resubmits your sitemap to Search Console, so Google sees there’s something new.
Google has one more step, and it’s yours. Open the article in AlmaSEO, find the Search Engine Submission card and click Resubmit sitemap & check status. AlmaSEO checks whether Google has the page yet and opens it in Search Console. There, click Google’s own Request indexing button.
9. Watch it get indexed
Indexing takes anything from hours to a few weeks. AlmaSEO watches it for you, and all of this reads from Search Console, so none of it spends Data Credits:
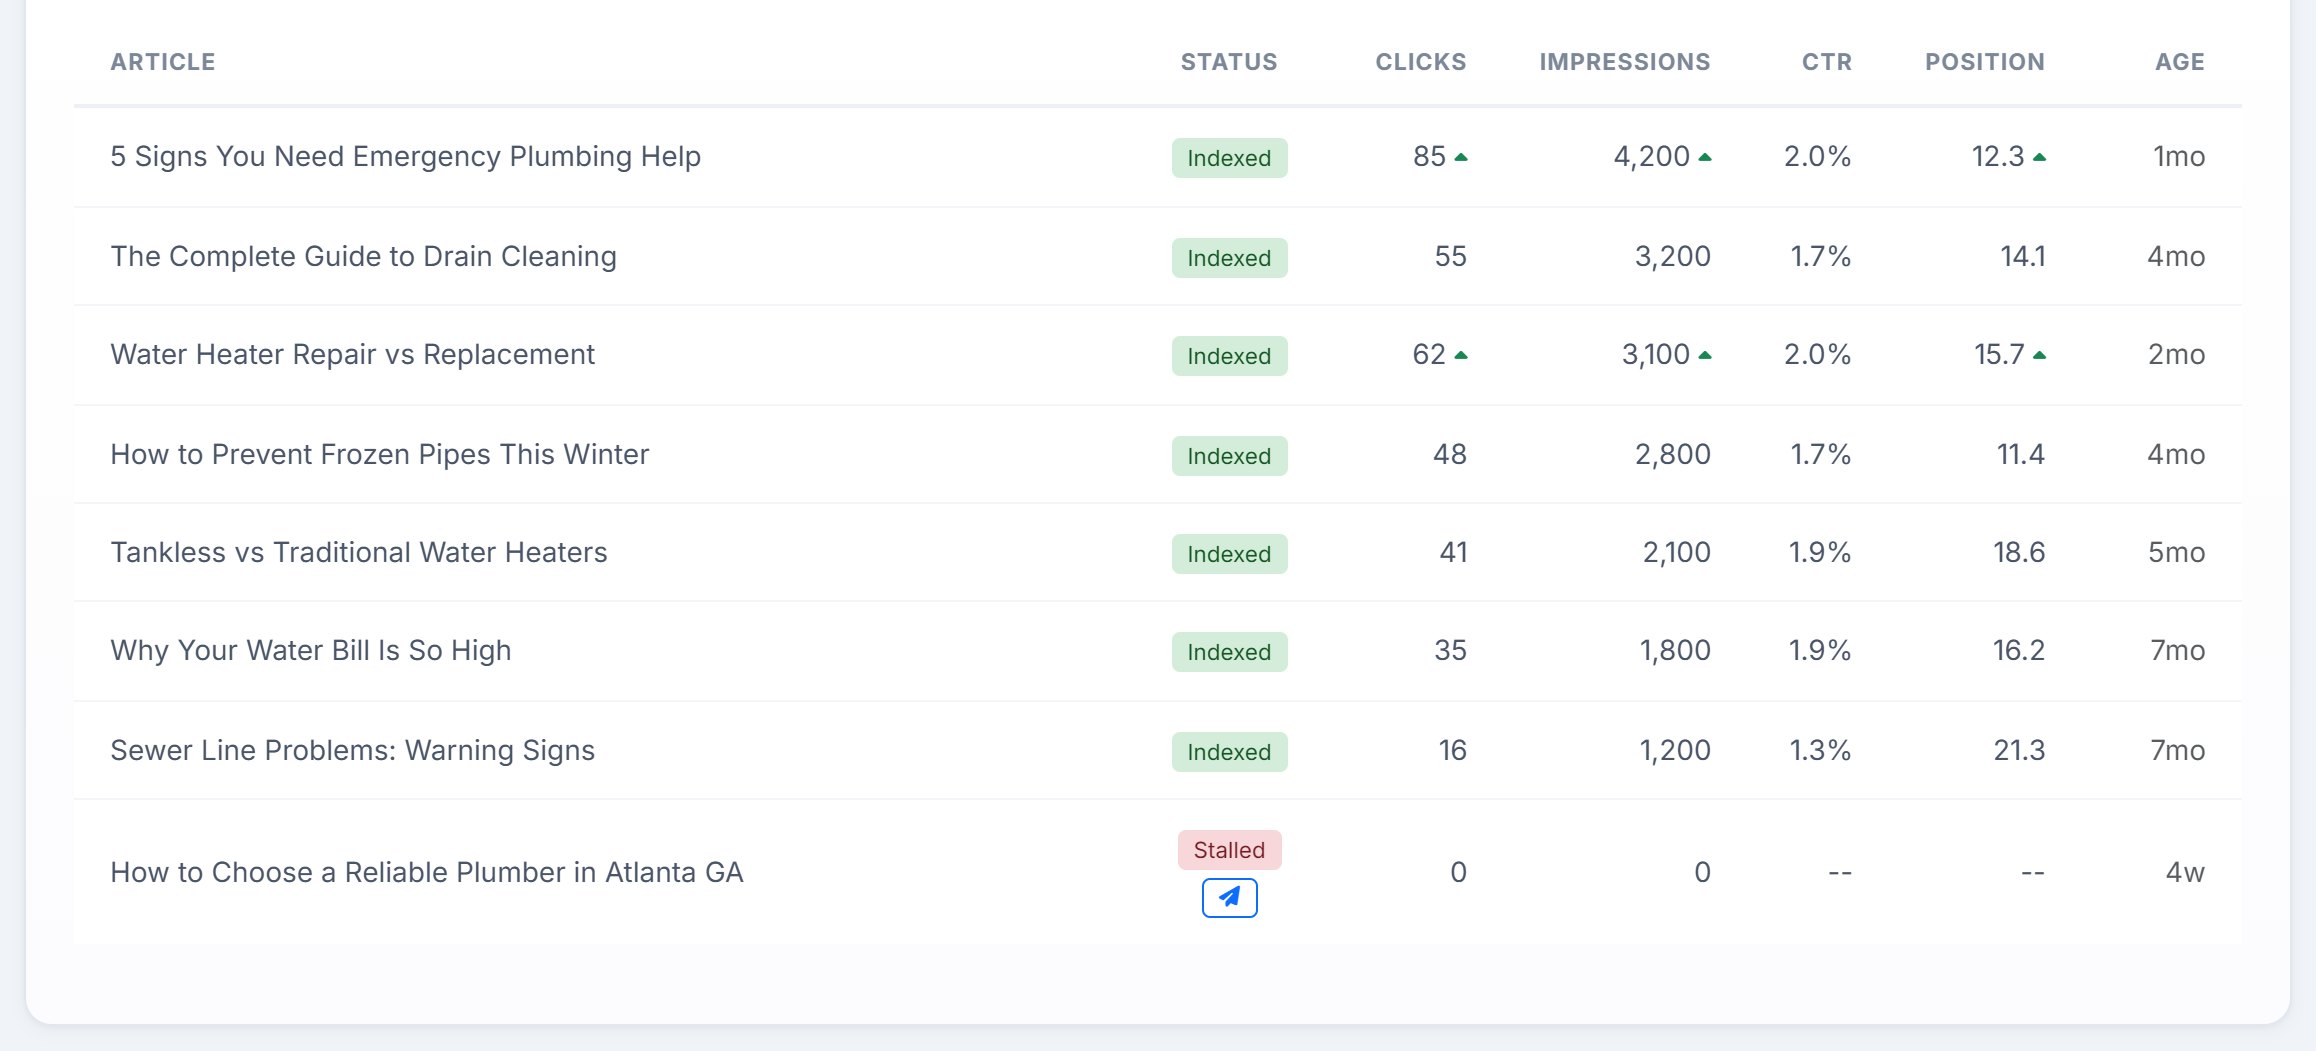
- Content Performance
- Under Content Hub in your site’s menu. One row per article with a status badge: Indexed, Not indexed, Stalled (still out after three weeks) or Deindexed (it was in and dropped out). Clicks, impressions, CTR and position fill in once Google starts showing it. An article still out after two weeks gets a status check and a link to Search Console.
- Page Indexing
- On the Search Console tab: the whole site’s indexed and not-indexed pages, with Google’s reason for each one in plain words. The URL Inspector on the same tab checks any single address.
- Daily Briefing
- Tells you if a page that was indexed drops out.
What to do next
Once Google starts showing your article, the SEO Intelligence tools have something to work with. They’re also how you pick article number two:
- Quick Wins finds searches where you already rank near the top but get fewer clicks than that position should earn. A better title, or a new article on the topic, can win them.
- Cannibalization checks that your new article isn’t competing with an older one for the same search.
- Keyword Research lists every search your site shows up for, with ideas for what to write next.
To learn the rest of AlmaSEO one screen at a time, the Academy starts with the Dashboard.